How to Create a Mood Board for Interior Design: A Complete Guide to Visualizing Your Perfect Space
How to Create a Mood Board for Interior Design: A Complete Guide to Visualizing Your Perfect Space
When you start thinking through a design project, you probably start with an internet deep dive. You take to Instagram, Pinterest, or any of your favorite blogs or decor brands looking for inspiring sights, colors, and ideas. When you find something you like, you save it — and before long, you have a collection of exciting, aspirational concepts to help you get started.
If you’ve ever done this, you’ve essentially already created an interior design mood board. The only step left is to learn how to make the most of it.


Understanding the purpose and benefits of interior design mood boards
A mood board for interior design is a collection of images and concepts that evoke the style or feeling of what you want your space to look like. It could include anything you think is helpful, from straightforward pictures of rooms you like to more abstract ideas and emotions you’d like to evoke, like “calming” or “welcoming.”
Creating a mood board is a great way to prepare for interior design projects of any size. Not only will creating one naturally help inspire and excite you, but they’re also an excellent way to keep your thoughts and ideas organized throughout the process.
There’s no one-size-fits-all procedure for creating the perfect mood board, of course, but there are some helpful tips to keep in mind when you start putting yours together.
Creating your interior design mood board, step-by-step
As you get started building out your mood board, following these steps can help ensure that what you end up with is as useful as possible.
Step 1: Choose between physical and digital mood boards
While this ultimately comes down to preference, each type of mood board you could create has definite pros and cons.
You can actually move around your pictures and ideas on a physical corkboard, for example, but to do that you’ll have to print out and arrange everything you want to look at. Digital mood boards are much more convenient and flexible since tools like Adobe, Canva, or Pinterest can provide you with drag and drop templates you can edit and share, but they lack the immediacy and tactility of physical mood boards.
You could also combine approaches for the best of both worlds. For instance, try starting with a digital mood board, then print and set up a finalized version with the most important details you want to represent. You could even create multiple different mood boards to compare and contrast two ideas and make up your mind.
Step 2: Clarify your design goals and preferences
Starting an interior design process can feel overwhelming, given the universe of possibilities you have to consider. This step is all about creating some realistic boundaries to help you better understand the possibilities.
First, put together your budget and timeline. How much money do you want to spend on this project, and how long do you want it to take? Write down both. This will give you an idea of how ambitious you want to be. If all you want to do is spruce up a room by next week, you probably shouldn’t be putting new windows or entertainment systems on your mood board.
Next, take a good look at the area you’re redesigning and consider how you want it to interact with the rest of your space. Do you already have a prevailing interior design style you want to represent? At this point, it may be helpful to write out your interior design concept statement to lock down your ultimate objective. This statement can help determine what does and does not belong on your mood board.
Step 3: Gathering inspiration from diverse sources
Once you’ve got your budget, timeline, and concept statement worked out, you can get started on your mood board properly.
This is the fun part: look far and wide for anything that sparks new and exciting design ideas. Don’t be afraid to save anything that piques your interest even slightly; paring down is the next step.
A few places you could look for inspiration include:
- Social media: Searching for pretty much anything interior design-related on Pinterest, TikTok, Instagram, or Houzz will give you all kinds of great ideas. You could get even more out of your search by looking up current trends like biophilia. Follow any creators you really like so you can keep seeing their latest ideas.
- Blogs: Blogs aren’t as dominant as they used to be, but they’re (clearly) still a great source of information. When you find a favorite source of home decor or interior design ideas, try looking up their site. Chances are, their passionate team has been writing up all kinds of useful posts.
- Real spaces: As they say, there’s no substitute for the real thing. Think about some of the most inspiring real locations you’ve visited — whether they’re friend’s homes, beautiful vacation spots, or even your favorite TV or movie sets — and see how you can recreate or evoke them in your own space.
- Favorite pastimes: Your new design is an opportunity to express yourself. Incorporating your own hobbies and interests as design motifs can help your space feel far more unique and personal. This could be nature, photography, fashion, personal history, favorite colors, or anything else you want to make a prominent part of your space.
Step 4: Organize and curate your collected ideas
By now, you should have an extensive collection of images, ideas, and concepts that kickstarted your imagination. Now, it’s time to start organizing all of this potential into something cohesive.
Start by building categories on your mood board. Organize your different findings into labeled groups that share some commonality, like color theory, texture, design aesthetic, or even just what they evoke for you.
Once you’ve settled on your categories, it’s time for something a little trickier: choosing your favorites. As you look at the different groups you’ve just created, what stands out? What will work nicely together, and what doesn’t fit with anything else? From here, you can start paring back, removing ideas that don’t fit with and consolidating categories to create a more cohesive whole.
As you’re scaling back, keep an eye out for more recurring patterns and ideas you may not have noticed at first. Ideally, this process will help focus the overall idea of your upcoming design into something you can clearly articulate and execute.
Remember: this period of “editing” is also a highly creative process. Don’t be afraid to let your vision evolve and even morph as you rearrange and cut back on your ideas. You may even discover something during this stage that prompts you to rethink your core concept entirely — that’s alright! Repeat this process as many times as you need to until you’ve created a mood board that truly excites you.
Bringing your mood board to life
When you’re finished with your mood board, you should have a clear idea of what you want to accomplish with your space, why, and how you’ll go about it. All that’s left now is to make it a reality.
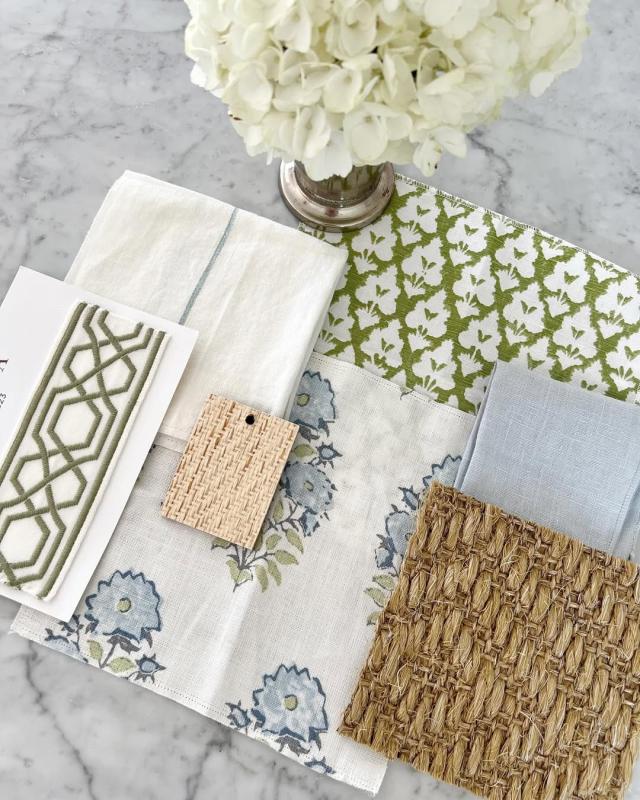
Adding a rug sample to your mood board can give you something real to touch and inspire your next big eureka moment. Sisal Rugs Direct provides up to four free samples and swatches of all of our rugs — and if you want even more, they’re only $1.50 a piece after that. Good luck creating your next mood board! We can’t wait to see what you come up with.


